Tuesday, August 21, 2012

Rocking Chair Planter - Curbside Find!


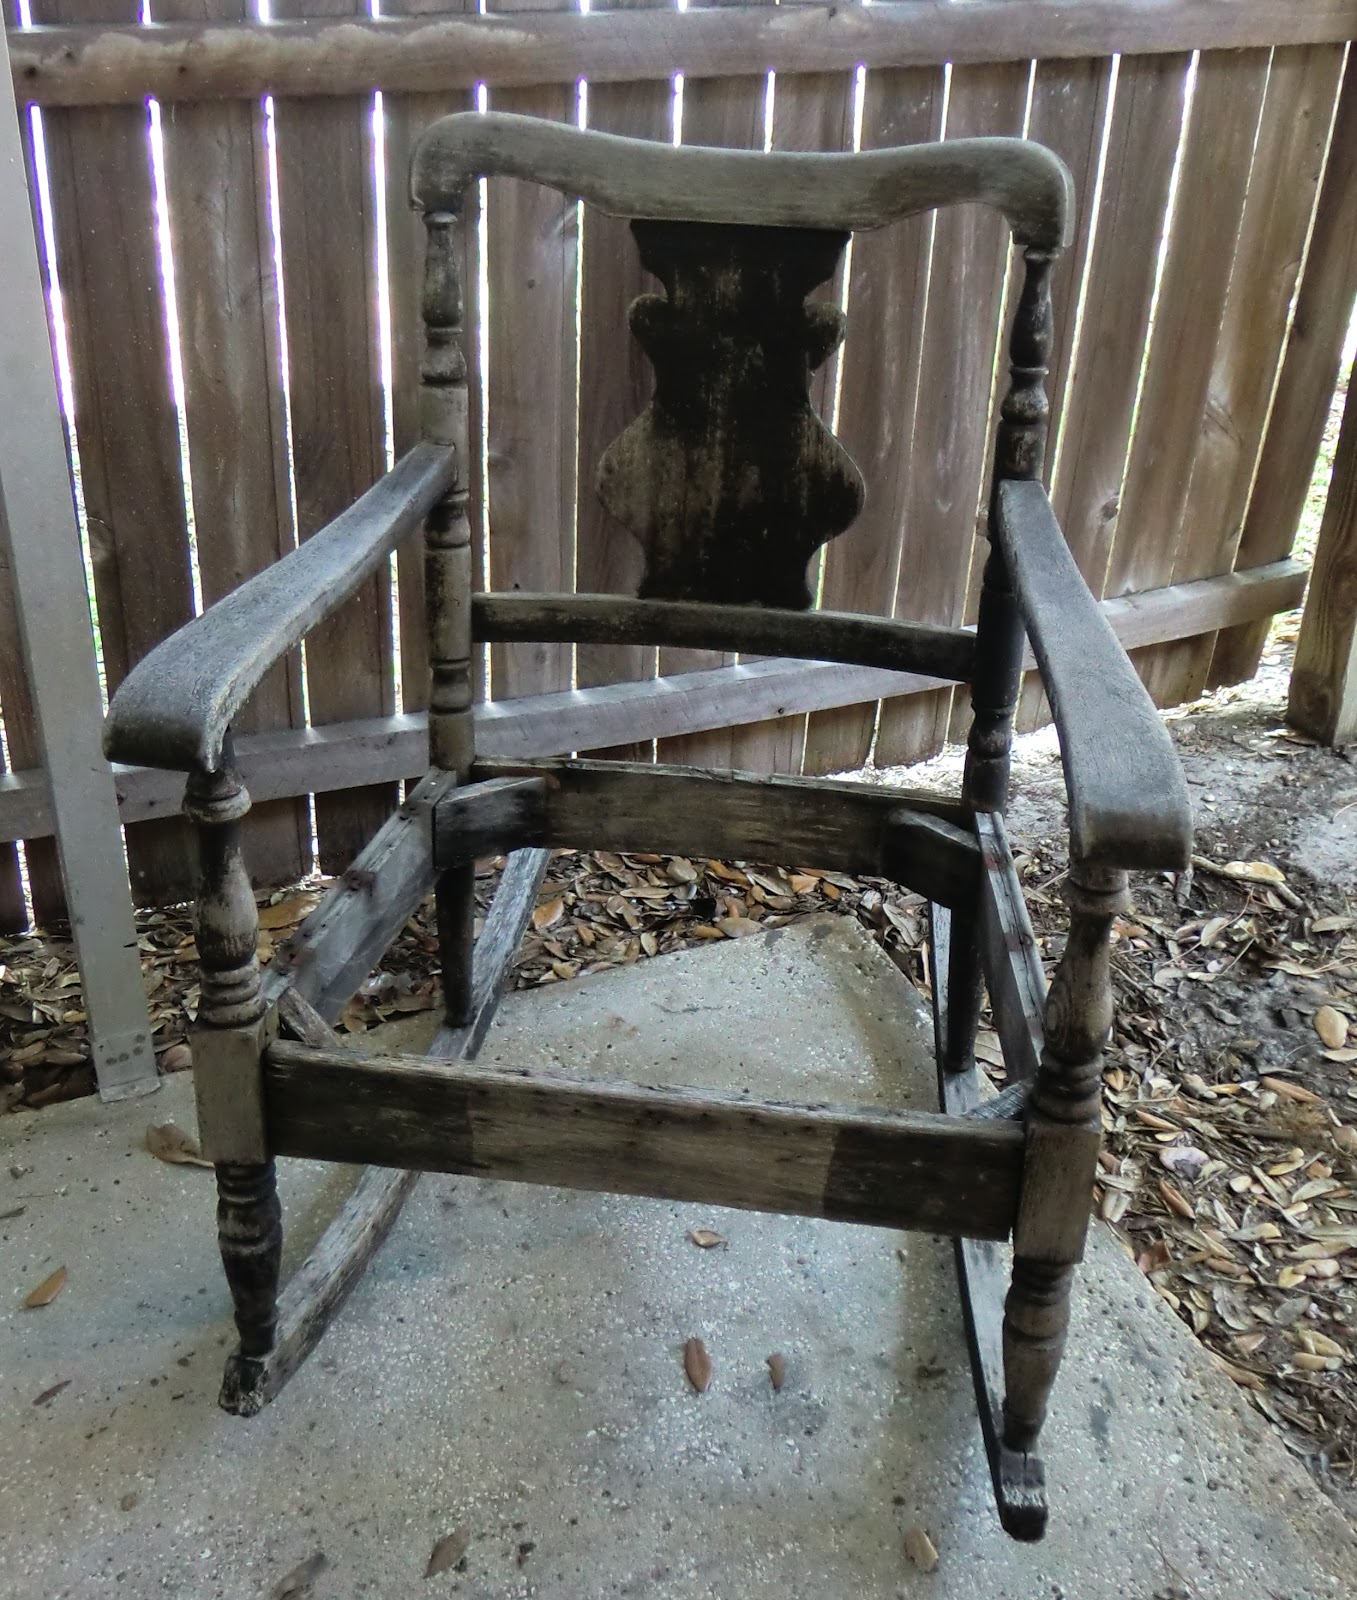
Before:
Curbside Rocking Chair
After: Rocking Chair Planter
While walking the dogs a few weeks ago, Hubs found this dilapidated old rocking chair in the alley ready for trash pick-up.  I must admit, I was a little skeptical about the potential.  Seriously...this thing looked like the front rockers had been chewed on, it was ridiculously wobbly.  So as not to hurt his feelings, and in appreciation for his support of my ShabbyGlam projects I did not immediately throw it in the dumpster...instead I put it out of sight in our side yard.

But it called to me.  Every time I walked by on the way to get a tool or ShabbyGlam supplies, it spoke to me.  I did love the shape of the chair and finally I decided that I just had to make something special from it.  Here's how I turned this dumpster-destined rocker into a ShabbyGlam garden planter.
Rustoleum Ultra Cover
Summer Squash

Spray Painted
SPRAY PAINTING: I spray painted the chair with a soft Summer Squash satin paint (Painter's Touch Ultra Cover by Rustoleum) that Hubs picked out for me.

SANDING: Next, I sanded down the fronts of the rocker legs that looked like they had been chewed on.


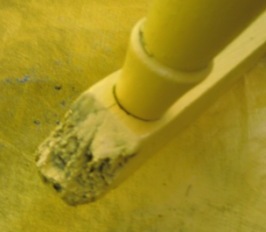
Chewed up rocker legs
took some sanding.

Sanded the chewed up
rocker legs until smooth.


Formerly jagged rocker
legs after sanding.
WHITEWASHING: Next, I white-washed over the yellow color to give it a two-toned distressed look.  Here's how to whitewash: If you haven't tried whitewashing yet, it's super easy!  Just add water to white paint (or any color for a color wash) until the paint is about the consistency of milk.  Brush on with a paint brush and wipe off with a rag until you get the desired look.

I should let you know that this isn't a perfect science.  When I was done whitewashing, I decided it was too white and color-washed with a squash color over the top.  This turned out beautiful!

STENCILING:  I decided the back needed a little more character, so I decided to pull out an old stencil that I used a few years ago on a wall in my entryway.

Whitewashed Rocking Chair
- How to Whitewash Furniture.

Prepping for stencil.

Rocking chair after stenciling.


DISTRESSING:  Now I moved on to distressing the chair to make it look as old as it actually is.  This is the easy part - just sand it down until it looks old!  I also sanded over the stenciled section to make sure it looked like it had been there for years.

Sanding the edges for a worn look.

Distressing the rocker by sanding the edges.
After adding added some wood glue at the seams and a few screws to make the chair more stable and less wobbly, I added two coats of Rustoleum's Ultra Cover Clear Gloss to seal and protect the finish.  This is especially important because this will be outside in the sun and weather. This stuff also acts as a sunscreen for furniture because it includes UV protection!
Applied 2 coats of
Rustoleum Ultra Cover Clear Gloss.


PLANTING:  Hubs picked up the perfect sized planter, and I painted it to make it blend with the chair. I planted some spreading flowering plants so that eventually they'll grow over the sides of the rocker and cascade toward the ground.

FINISHING:  Finally, I dropped the planter inside the rocker, and placed it near my shed as a focal point in the back yard.

Finished Rocking Chair Planter in my backyard.  Next project is a back yard firepit among the rocks!

Can't you just picture the fire pit I'm going to create among the rocks! There will be smores this winter...You betcha!  Please comment below and let me know what you think!

Sunday, August 12, 2012

CD Rack Trellis

Spray paint
A few months ago, I found a CD Rack at a yard sale.  It was marked $4.00, but I was able to talk my way to $2.00 for this gem.  As soon as I saw the rack, I knew it would someday be either a topiary or a trellis for a blooming vine of some sort.  That day is today, and here is my up-cycled CD Rack-turned-trellis.
Green Apple spray paint
by Rustoleum
$2.00 CD Rack
from a yard sale.
SPRAY PAINT: I painted it satin green apple (Rustoleum Ultra Cover Spray Paint).

Whimsical dots added with the handle end
of the craft paint brush.
CRAFT PAINT: I painted every other rung on the front with outdoor craft paint.  Next, I added dots to create a whimsical look. These dots are really easy to create.  Just dip the handle end of a craft brush in the paint, then dot it onto the item.  It creates great little dots every time.  To make bigger dots, use a bigger brush.

MOUNTING and PLANTING:  I mounted my new trellis on the fence next to my shed and planted a pink blooming Allamanda vine underneath it.

Mounted CD Rack Trellis on the fence
above a pink blooming Allamanda vine.

Mounted CD Rack Trellis next to the shed.
Won't it be beautiful as the vines grow through it?