Saturday, July 28, 2012

Perfect DIY Laundry Detergent: Smells Wonderful, Works Better, and it's Cheaper!

My Fab DIY Laundry Detergent!
I'll admit it. I love great smelling laundry.  My laundry must be clean, but it also needs to smell wonderful. When I stumbled across Jen's recipe for DIY laundry detergent, she completely hooked me when she said it not only cleaned great, but smelled awesome!  I was still skeptical, but I thought it would be worth a try.  And...here's the clincher:  $28.00 per year!  I was paying around $75/year for my other detergent.  This stuff smells wonderful, works better, and is cheaper!  Props to Jen, who guest posted at howdoesshe.com.  Thanks for sharing, Jen!


Here's the how-to:

Ingredients:
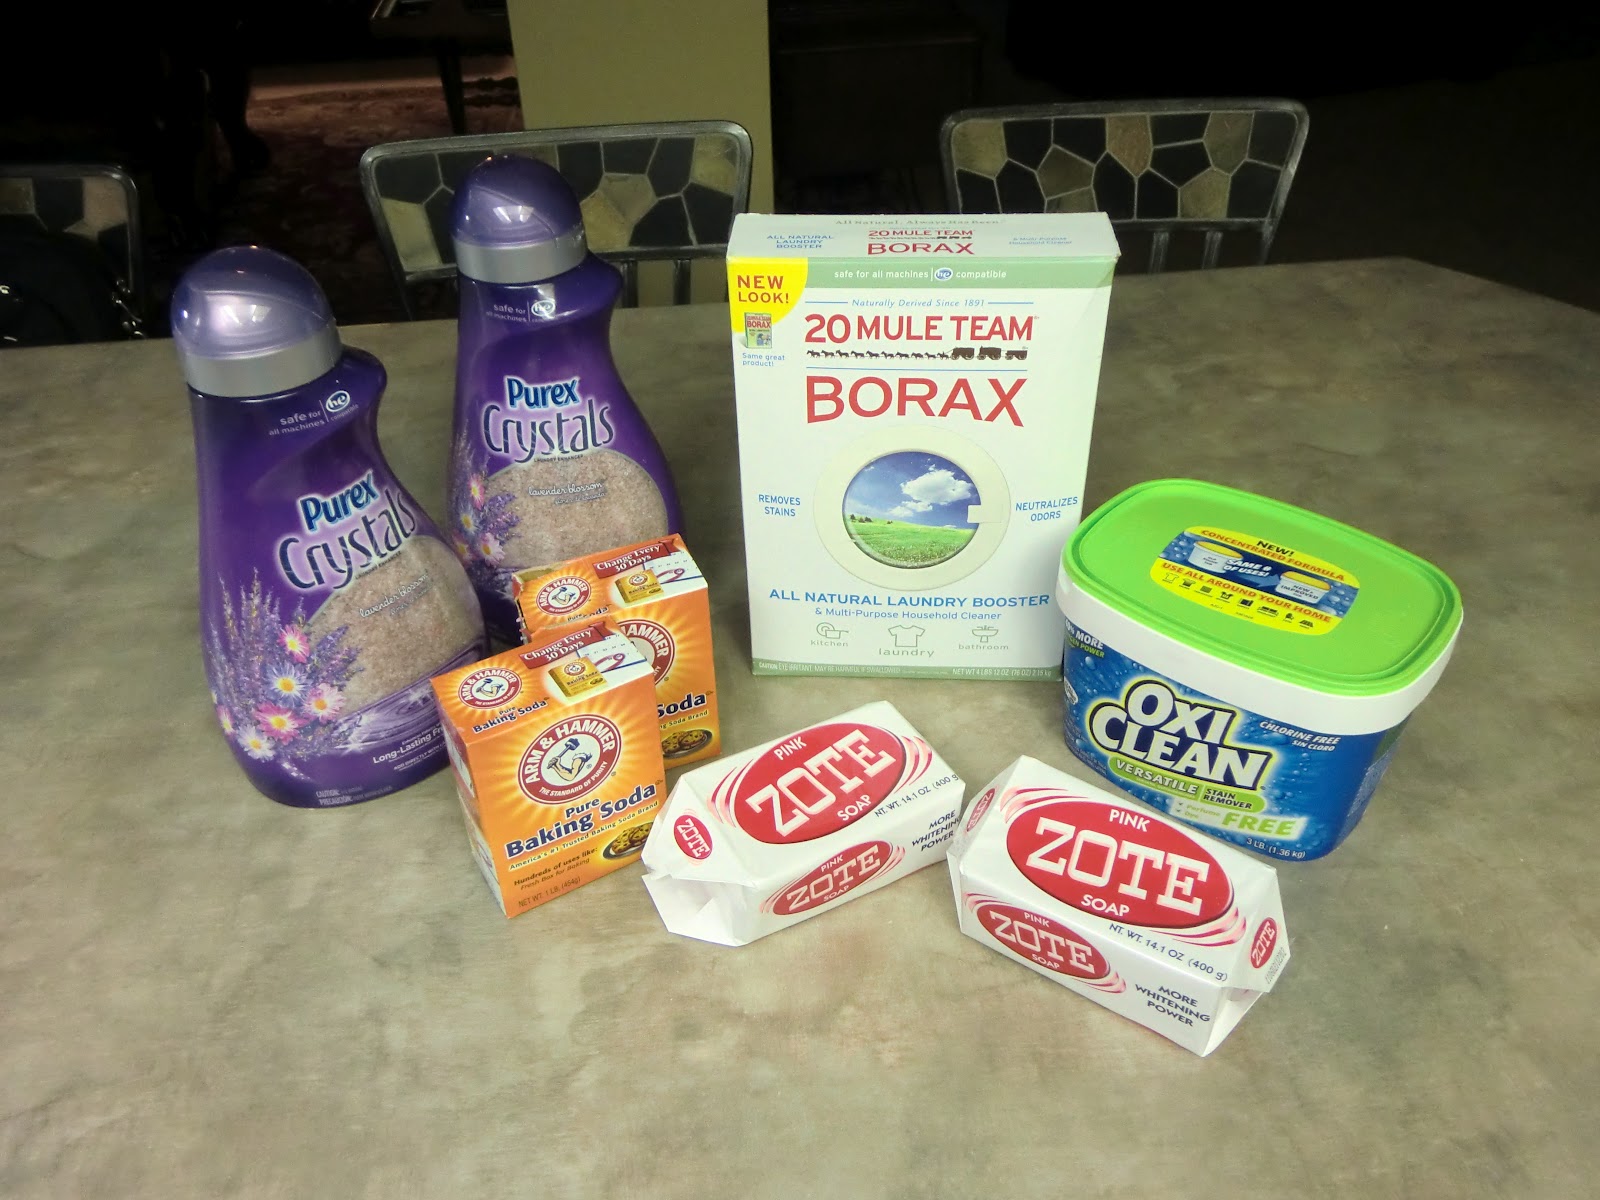
1 (4 lb 12 oz) Box of Borax - Found in the detergent aisle
1 (3 lb 7 oz) Box of Arm & Hammer Super Washing Soda - Found in the detergent aisle
1 (3 lb) Container of OxyClean - Found in the detergent aisle. 
2 (14.1 oz) Bars of Zote Soap - Found in the detergent aisle (I used pink because it smells fab! Jen says you can also use Fels Naptha)
2 (2 lb) Boxes of Arm & Hammer Baking Soda - Found in the cooking aisle (or one 4 lb box)
1-2 (55 oz) Bottle of Purex Crystals Fabric Softener- Found in the detergent aisle ( I used 2 bottles This is optional, but makes it smell fabulous!)
Ingredients for DIY Laundry Detergent
(Arm & Hammer Super Washing Soda not shown)
I began by shredding the Zote soap with a cheese shredder. Don't worry, since it is soap it disolves in hot water and easily comes off of your cheese shredder.  I cheated and used my food processor shredding attachment.  Worked like a charm.  Jen at howdoesshe.com shredded it by hand.  She said it was time consuming to do by hand, so I used the food processor, which was quick and painless!
I cut the soap into pieces that fit into the food processor.

Feeding the soap through the food processor.

Shredded cheese soap.
Because there were so many ingredients, I decided to mix two batches of ingredients.  I blended the shredded soap, the Borax, and the Baking Soda together first.  This Captain America movie popcorn tub worked great for this first batch.  Some of the baking soda and borax was clumpy, so I pushed it through a strainer to make sure it would blend nicely.

I pushed the borax and baking soda
through a strainer to remove clumps.
Next, I layered the remaining ingredients in a large bowl, stirring before adding each layer.  Then, I layered the first batch with the second batch in a leftover kitty litter bucket.  For convenience, I poured a batch into each of the Purex Crystals containers.  It takes 2 tablespoons per load, and the cap to the Purex Crystals container works as a great measuring scoop.


You really must try this - it's easy to make, and it is SO MUCH BETTER than store-bought detergent!  If you make some, please post a comment.  I'd love to hear how you like it!

Monday, July 16, 2012

DIY Vase Fountain

Hubs and I have always enjoyed the sound of trickling water, so we decided it was time to add a gurgling water feature to our entryway next to our front deck.  It turned out fabulous, so I want to share with you the steps we took to make it.
Finished DIY Vase Fountain

Great vase - from a local nursery.
We bought this beautiful vase from a local nursery.  Hubs drilled the hole in the bottom of the vase for the hose connecting to the pump.

Hubs drilled this hole in the vase,
and we fed the pump tube through.

Here's the pump tube on the inside of the vase.
Next, we cut an old trashcan down to around 1 1/2 feet tall to use as the water reservoir.  We burried the trash can so that the rim was ground level and added cement blocks up to the rim.  We attached the pump to the vase, then placed the pump in the reservoir.

Burried a trash can, then added cement blocks up to the rim.


Product info on the pump. (purchased at Home Depot)

Connected pump to the vase
Added a sheet of mesh netting over the cement blocks.

Mesh netting over cement blocks.
We added a sheet of mesh netting over the cement blocks, then placed the vase on top.  We ran the pump hose through the mesh netting, added water, and plugged it in!  We covered the edge of the netting with a ring of flagstones and added black Mexican river pebbles to cover the netting.


The pump hose runs through the mesh netting

Added water to the fountain and plugged it in!
Added decorative flagstones to cover
the edge of the mesh netting.


Added black Mexican river rocks to cover the mesh netting.
Here's our finished gurgling Vase Fountain!
Watch the video, and turn up the sound to hear the beautiful bubbling water!  All there is left to do is mulch!

We now enjoy the peaceful gurgling of our new vase fountain as we sip Iced Tea on our front deck.

Tuesday, July 10, 2012

Shed Makeover - How to

Time for the big Shed Makeover Reveal on ShabbyGlam.  This was previously guest-posted on My Repurposed Life.  Thanks to everyone who visited me on Gail's blog!

I turned this vintage window into a mirror,
added a shelf and hooks, and mounted it on my shed.
Find out how to turn any glass into a mirror.
I am in the process of creating my dream backyard.  Phase one is now complete:  The Shed Makeover!  I'm excited to share with you the steps I took to take a hideous old white aluminum shed and turn it into a charming focal point of my salvage-chic backyard.   Here's the pitiful "before" picture...but I saw potential!  Here's a link to the overall design plan for my Dream Backyard.
Shed Before Paint - So Ugly!
Step 1: Paint!

a) CLEAN: My energizer bunny daughter (age 13) and I scrubbed down the shed with DAP T.S.P Substitute heavy-duty cleaner and a roofing brush. This stripped the loose chalky old paint off the shed to prepare for primer. b) PRIME: We primed the entire shed and roof with Zinsser primer.  c) PAINT: Then we put two coats of paint on the shed, including the roof.  We used a flat paint for the green walls and a satin finish paint for the red door.  I painted the edge of the roof brown, but hated it and changed that color to periwinkle blue.
Cleaned the shed of loose paint
with DAP T.S.P. Substitute.
Primed the shed with Zinsser.


Step 2: Add Roof Trim & Frame the Door.  The brown aluminum roof fascia looked insubstantial and boring so my husband offered to add wooden trim!  I painted furring strips ($1.15 per 10 food board...such a bargain!) in a fabulous periwinkle blue, and we (he) mounted them to the aluminum fascia.

Panting the furring strips to use as trim for the shed.
Added wood trim for roof fascia & door trim.


Step 3:  Door Wreath.  I added this Floral Wreath Swag (see how to make the swag) to the door.

Step 4: Shelf.  Next, we added a shelf to the side wall.  We made this using two simple L-brackets that I had left over from another project.

We mounted the L-brackets behind the board to hide them.
Step 4: Vintage Window Painted:  I found these fabulous vintage windows on Craig's list for $5 each!  (I know all you repurposers out there are totally jealous!).  I took one of the windows and cleaned it with DAP's T.S.P. Substitute mentioned above, sanded it, then painted it blue to match the shed trim.

Vintage windows from Craig's list for $5 each!

Scrubbed clean with TSP Substitute, then sanded them down to prep for paint.

Painted Periwinkle Blue! 

Step 5: Vintage Window turned into a Mirror!  My son had a great idea!  He suggested that the window would look better as a mirror.  Roeshel at The DIY Club did a similar vintage-window-turned-mirror project using Krylon Looking Glass Mirror-Like Paint.  I followed her lead, and it worked like a charm!  I masked and taped off areas not to be painted. Next, I sprayed about 5 light coats of Looking Glass, allowing it to dry 1 minute between coats (as recommended on the can).  Because my new mirror was going outside, I sprayed an Rustoleum Outdoor Metalic Finish over the Looking Glass paint to seal it.  Next, I mounted it on the shed.

Krylon Looking Glass Mirror-Like Paint - creates
 a reflective surface that looks like a vintage mirror!

Sprayed Rust-oleum Outdoor Metalic Finish
over the Looking Glass Paint to seal it for Outdoor use.


Masked and taped areas not to be spray painted.


Step 6:  Added outdoor faucet handles:  Don't these make great hooks for my garden tools?

Vintage Window is now this fabulous mirror, complete with fabulous faucet handle hooks!
Give me your feedback:  As you can see in one of the pictures above, I lucked out and found someone getting rid of an entire house full of vintage windows!  If you have ideas on what to make from them, leave a comment on this post!  I definitely want to make a Window Cabinet, like the one Gail did! Love it!

Step 7:  Mount trellis & landscape:  We took a fan trellis and cut it in half to mount on either side of the window.  We planted jasmine vines and flowers, and voila!  

Finished Painted Shed Makeover!  Isn't the vintage window great?
Next phase in the Dream Backyard makeover...build a Fire Pit in front of the shed!

Follow Me on Pinterest button


Sunday, July 8, 2012

Painted Wind Chime

I found this simple green wind chime at Home Goods on clearance.  It has a beautiful ring to it, but was way too boring for me.

Wind Chime  "Before"
Wind Chime  "After"
I masked off the body of the chime and sprayed the top and bottom Green Apple.  Next, I stenciled a vine pattern around the top in light blue and repeated the stencil on the chime weight.  I outlined the stenciled vine in lime green to give it definition.

Wrapped the body of the chime to prep for spray paint.
Spray painted the top and bottom border Green Apple.
Stenciled a vine pattern around the top, and on the chime weight.

Outlined the blue stenciled vine in green.


I masked off stripes and painted them two-toned blue-green, then removed the tape and painted a thin blue lne on the top and bottom to accentuate the stripe design.

Masked off stripes, then painted two-tone blue and green stripes.

Added a thin blue line to accentuate the stripes and
 also outlined the chime weight in  a blue line.

Completed wind chime in my garden next to my shed.


Friday, July 6, 2012

Rescued Oriental Lanterns

I rescued two oriental lanterns from the dumpster a few months back.   I had no idea what I'd do with them at the time, but when I was painting my bamboo chairs, I sprayed these Green Apple.  Please excuse the "before" picture.  I sprayed the bottom of the lanterns with paint then realized that I needed to take a "before" picture...this was the best I could do.


Hanging Lantern "Before".  
They're spray painted with Green Apple

Rustoleum painter's touch
Satin Green Apple


Painted in pastel blue, purple, and pink over the green apple.
Finished lanterns find a home in the flower garden next to the shed.
Next I painted them in pastel colors, then added whimsical polka dots.  They found a beautiful spot in the yard next to my newly remodeled shed.
Finished Oriental Lanterns - view from below.